We make it easy to optimize your business
Digitalize your business, simplify your processes, customize to your needs
Why choose QUEUE?

Why QUEUE?
QUEUE is a fully customizable Cloud POS for your restaurant, cafe, or retail store that is easy to set up, simple to use, and full of unique features that will help you run your business more efficiently. There is no need to purchase additional expensive, bulky hardware and with no device or transaction limits, QUEUE easily grows with you.
Cloud Point of Sale
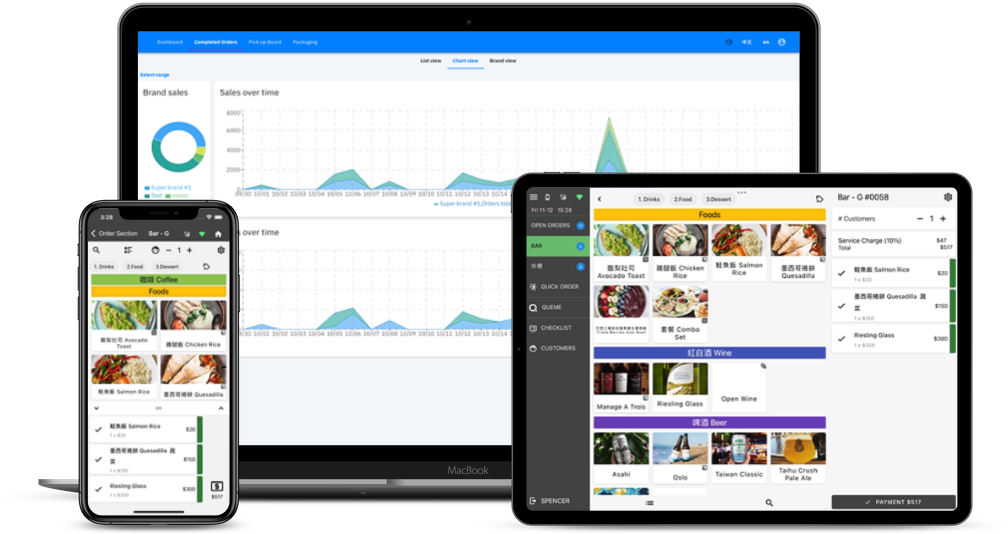
Run your business from any smartphone or tablet -- you can even mix-and-match iOS and Android devices. All data is securely stored in the cloud so that it can be synchronized with each individual device. Organize your menu, table layout, inventory, and staff directly on the app to deliver better service to your customers while keeping things simple for your staff.
Cloud Kitchen Platform
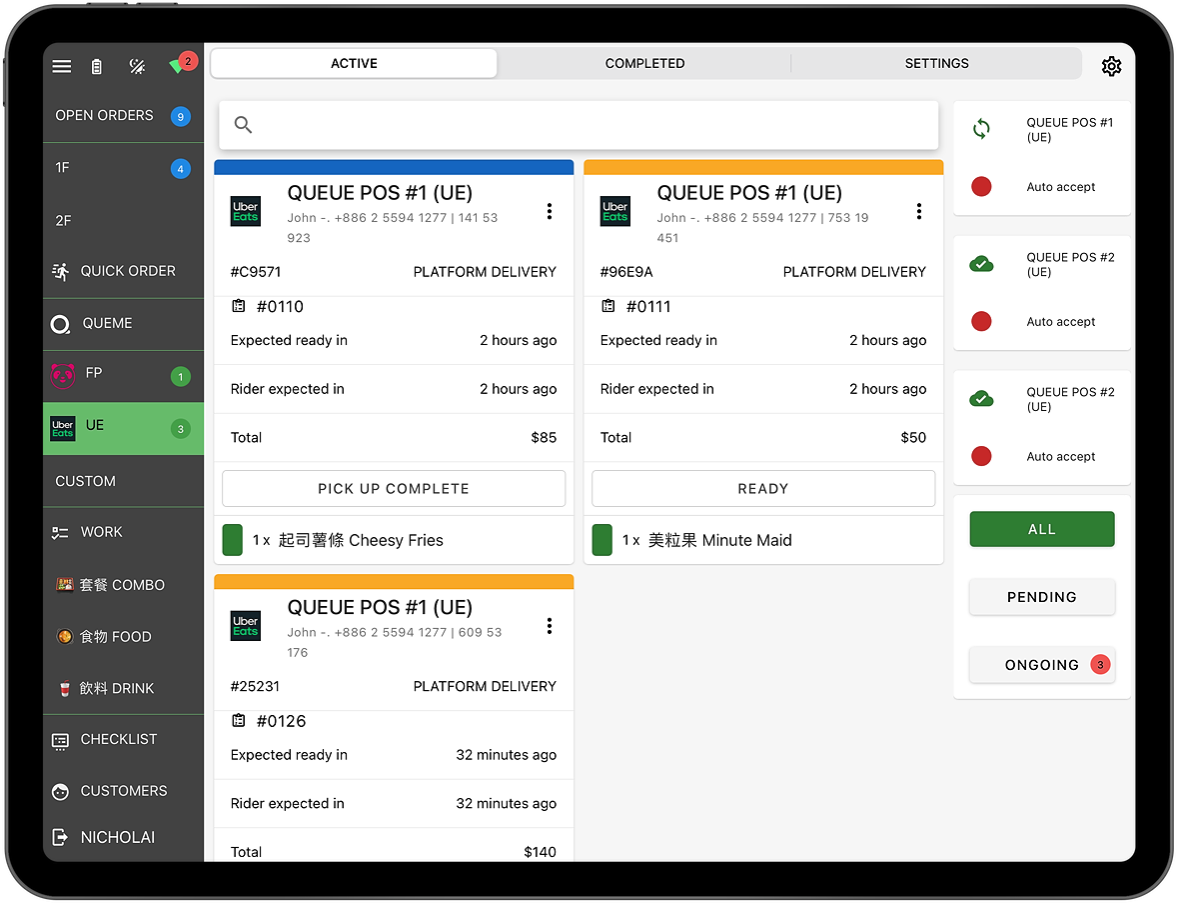
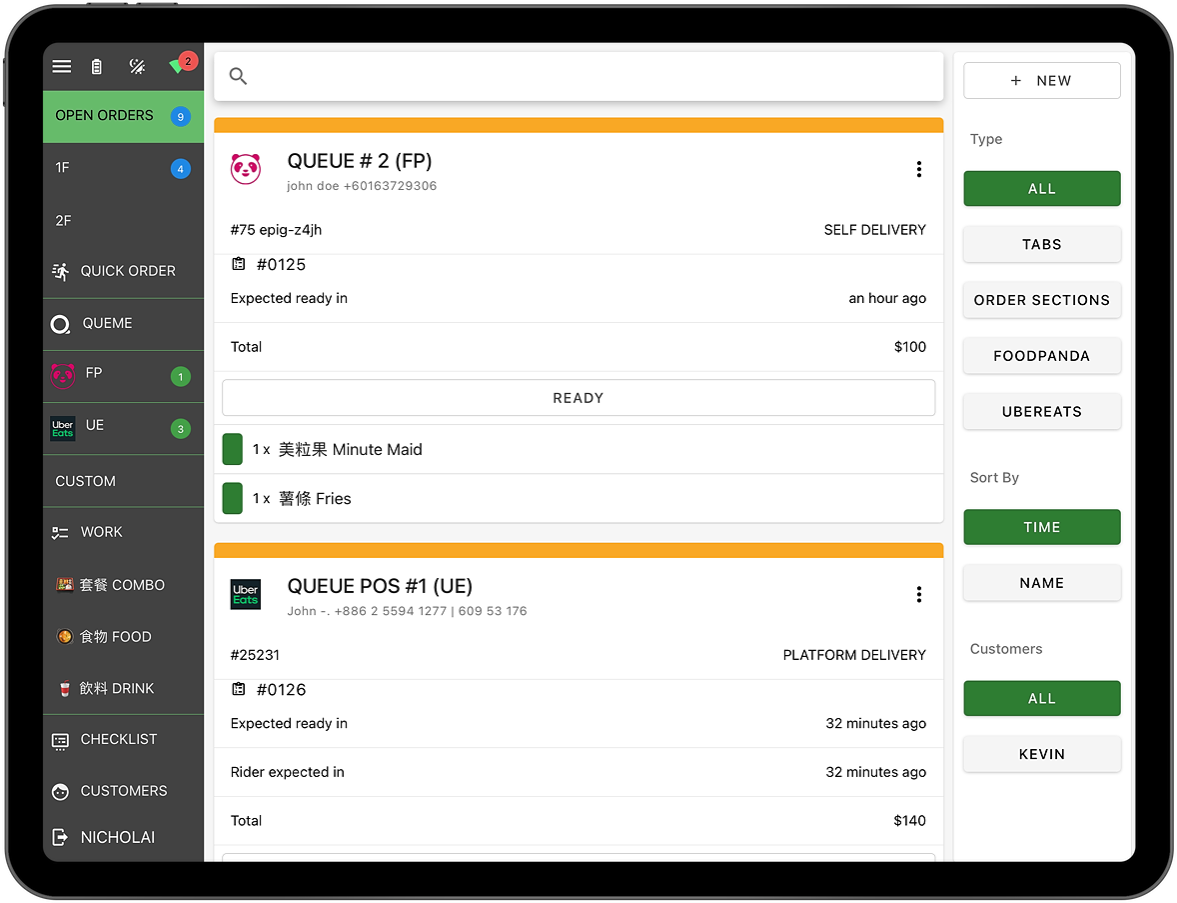
Fully integrated with the Uber Eats™ and foodpanda™ delivery platforms, QUEUE Cloud Kitchen will save you time and money with a fully customizable system designed specifically to meet the challenges of running a cloud kitchen. You only need to create your menu once and we’ll take care of the rest. All orders are automatically displayed in a single system, meaning that individual customers and pickup riders will have full visibility of their order progress the moment they enter your store.
Why choose QUEUE?
Cloud kitchens come in many flavors -- pun-intended -- but they are all uniquely dependent on technology to operate smoothly. While a lot of digital ink has been spilled on the numerous advantages of the cloud kitchen model, much less has dug deep into the problems companies face while running them. Most of these problems stem from how quickly and efficiently data can be organized and then shared with the people who need it. In other words, the digital backbone of a cloud kitchen is either its greatest strength or its greatest weakness. QUEUE offers the most powerful cloud kitchen solution on the market today, and believe us when we say you’re going to appreciate what we can do for you.
Problems that QUEUE solves for you
Too Many Devices
QUEUE is the only cloud kitchen solution in Taiwan that is able to aggregate all orders across platforms and brands into one single device. Without this aggregation, you may need to purchase many delivery tablets -- one per platform, per brand.
Tedious Menu Management
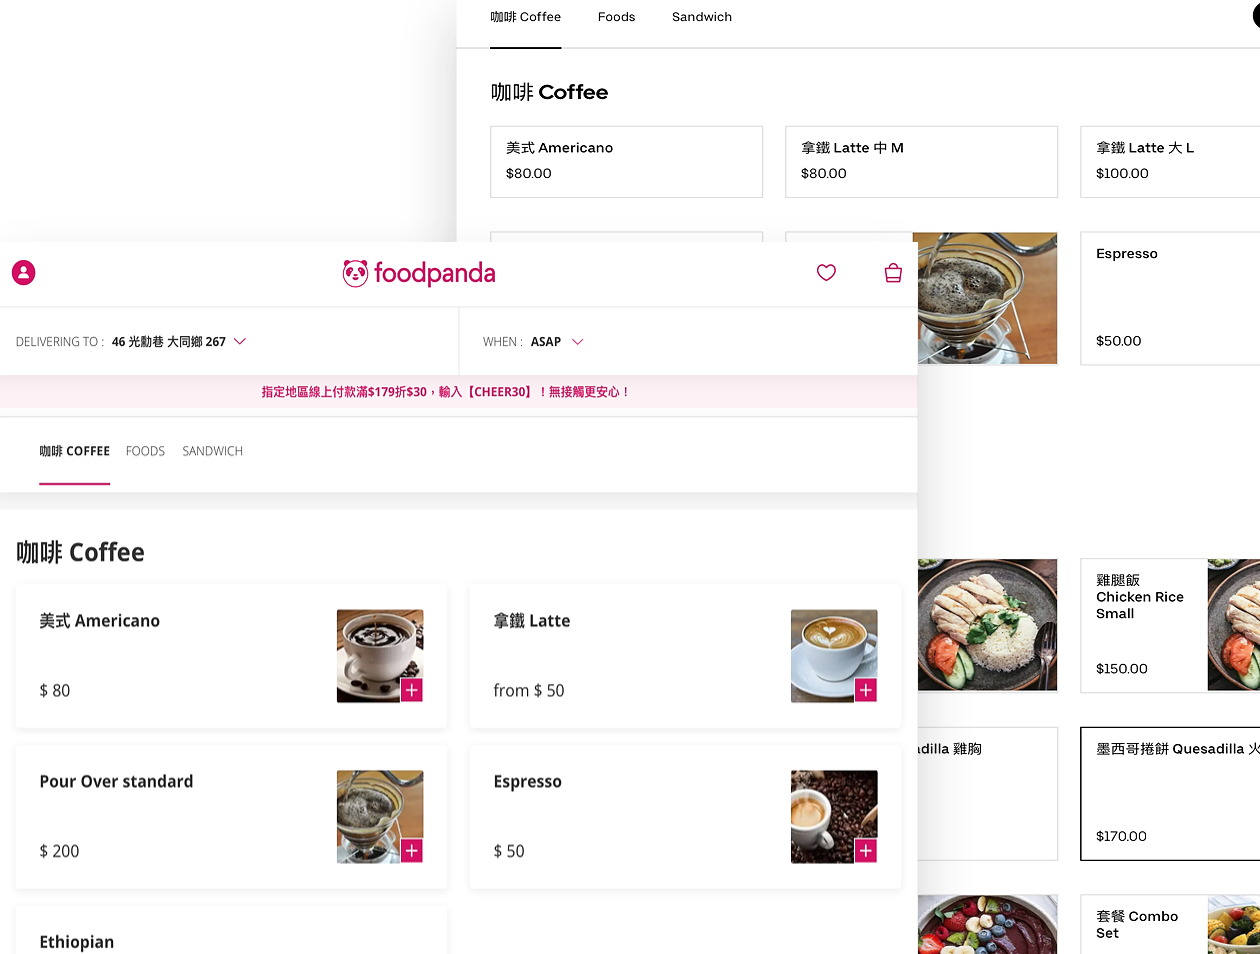
One of the obstacles associated with working across multiple delivery service platforms is that when you make any change, you have to manually key it into multiple systems. We completely eliminate that headache with automatic menu synchronization that even lets you create unique prices and naming on different platforms.
Wasting Time Manually Keying in Orders
We automatically create accepted orders with no need to manually key them into your POS, eliminating another time consuming and tedious task.
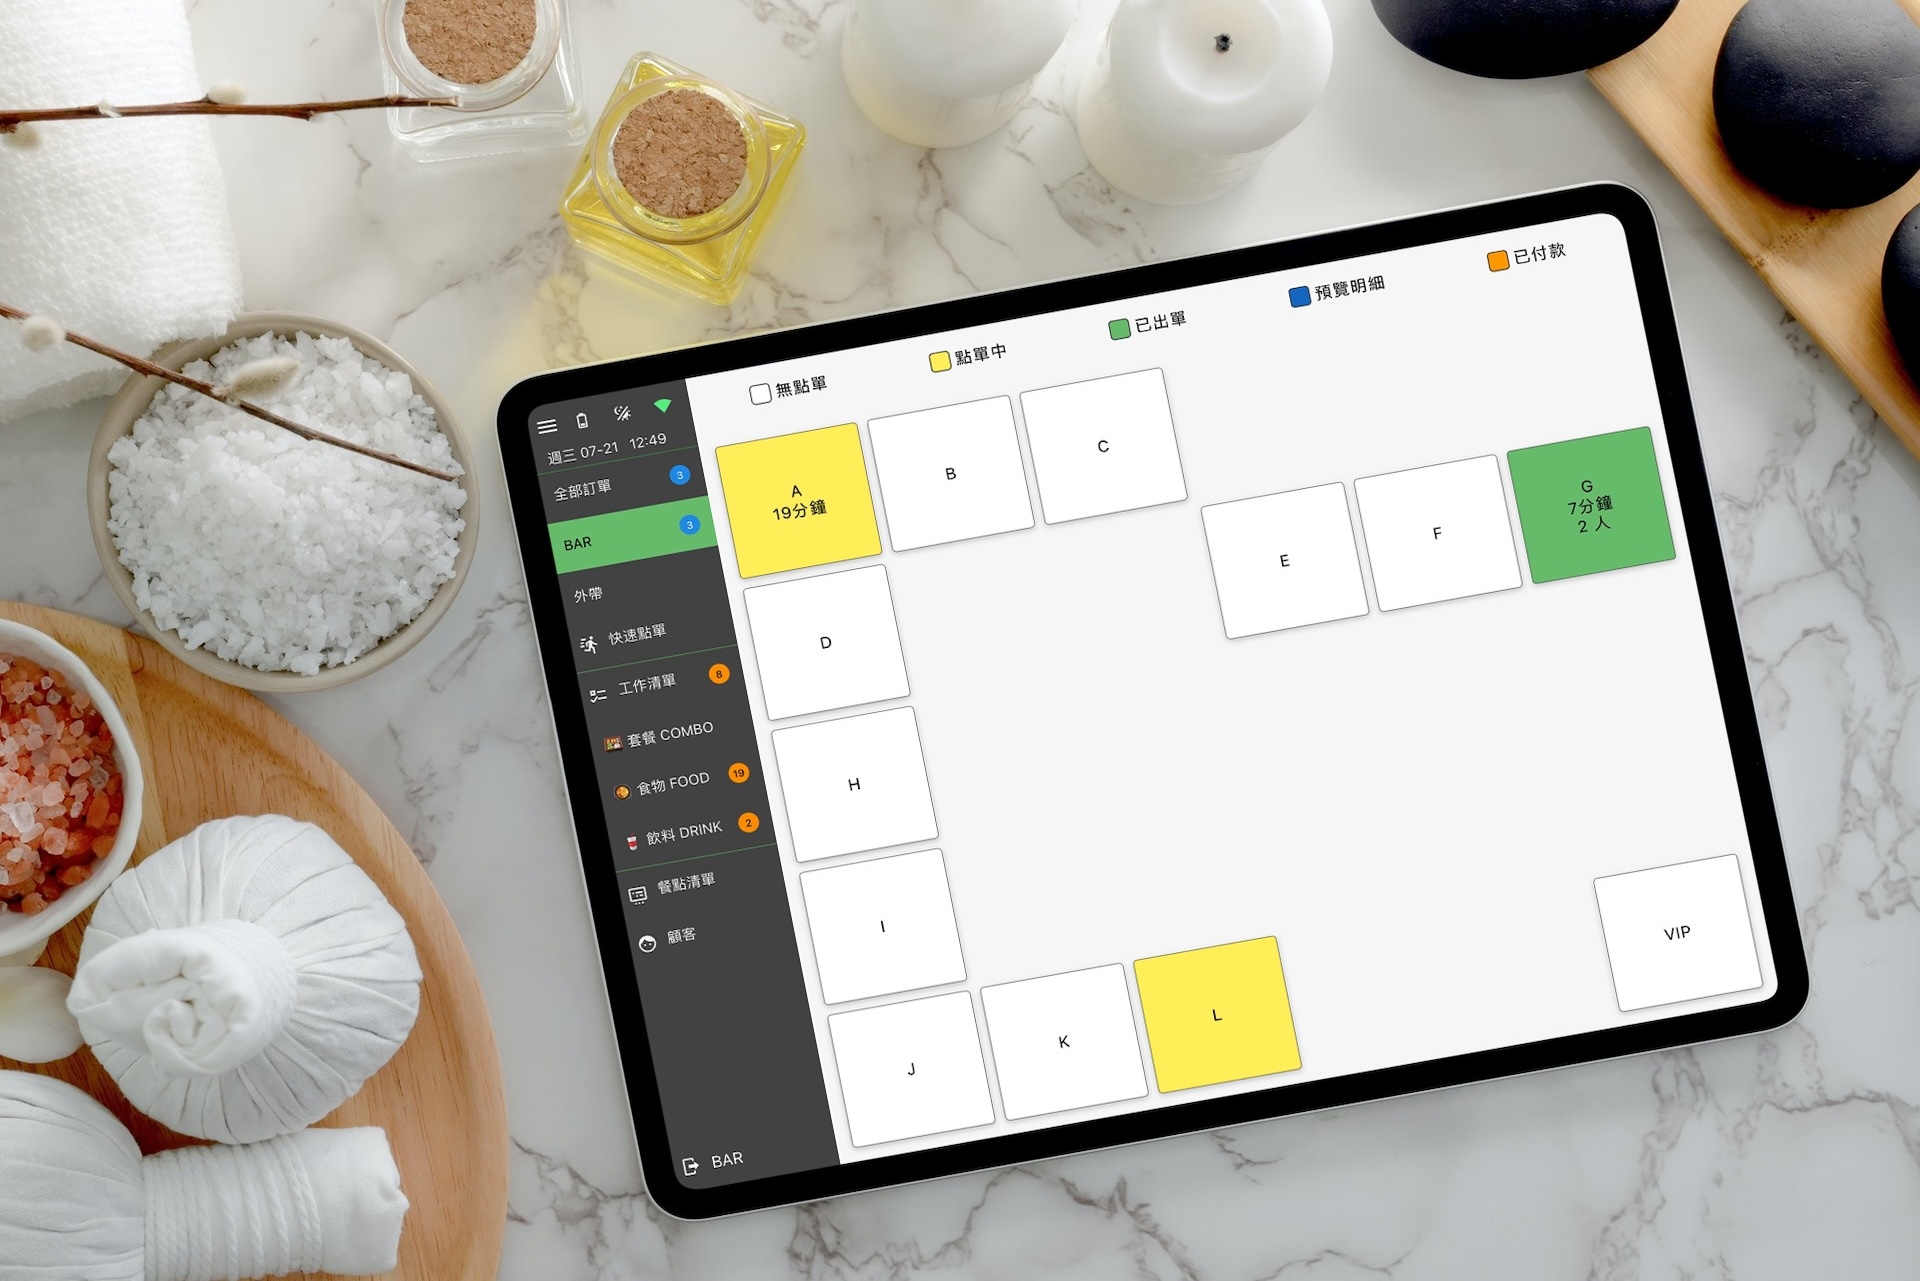
More Kitchen Stations, More Problems
QUEUE has no problem managing multiple kitchen stations simultaneously, because we can automatically forward incoming orders to whoever needs them, with no limit to the number of ticket printers or kitchen displays you want to put to use.
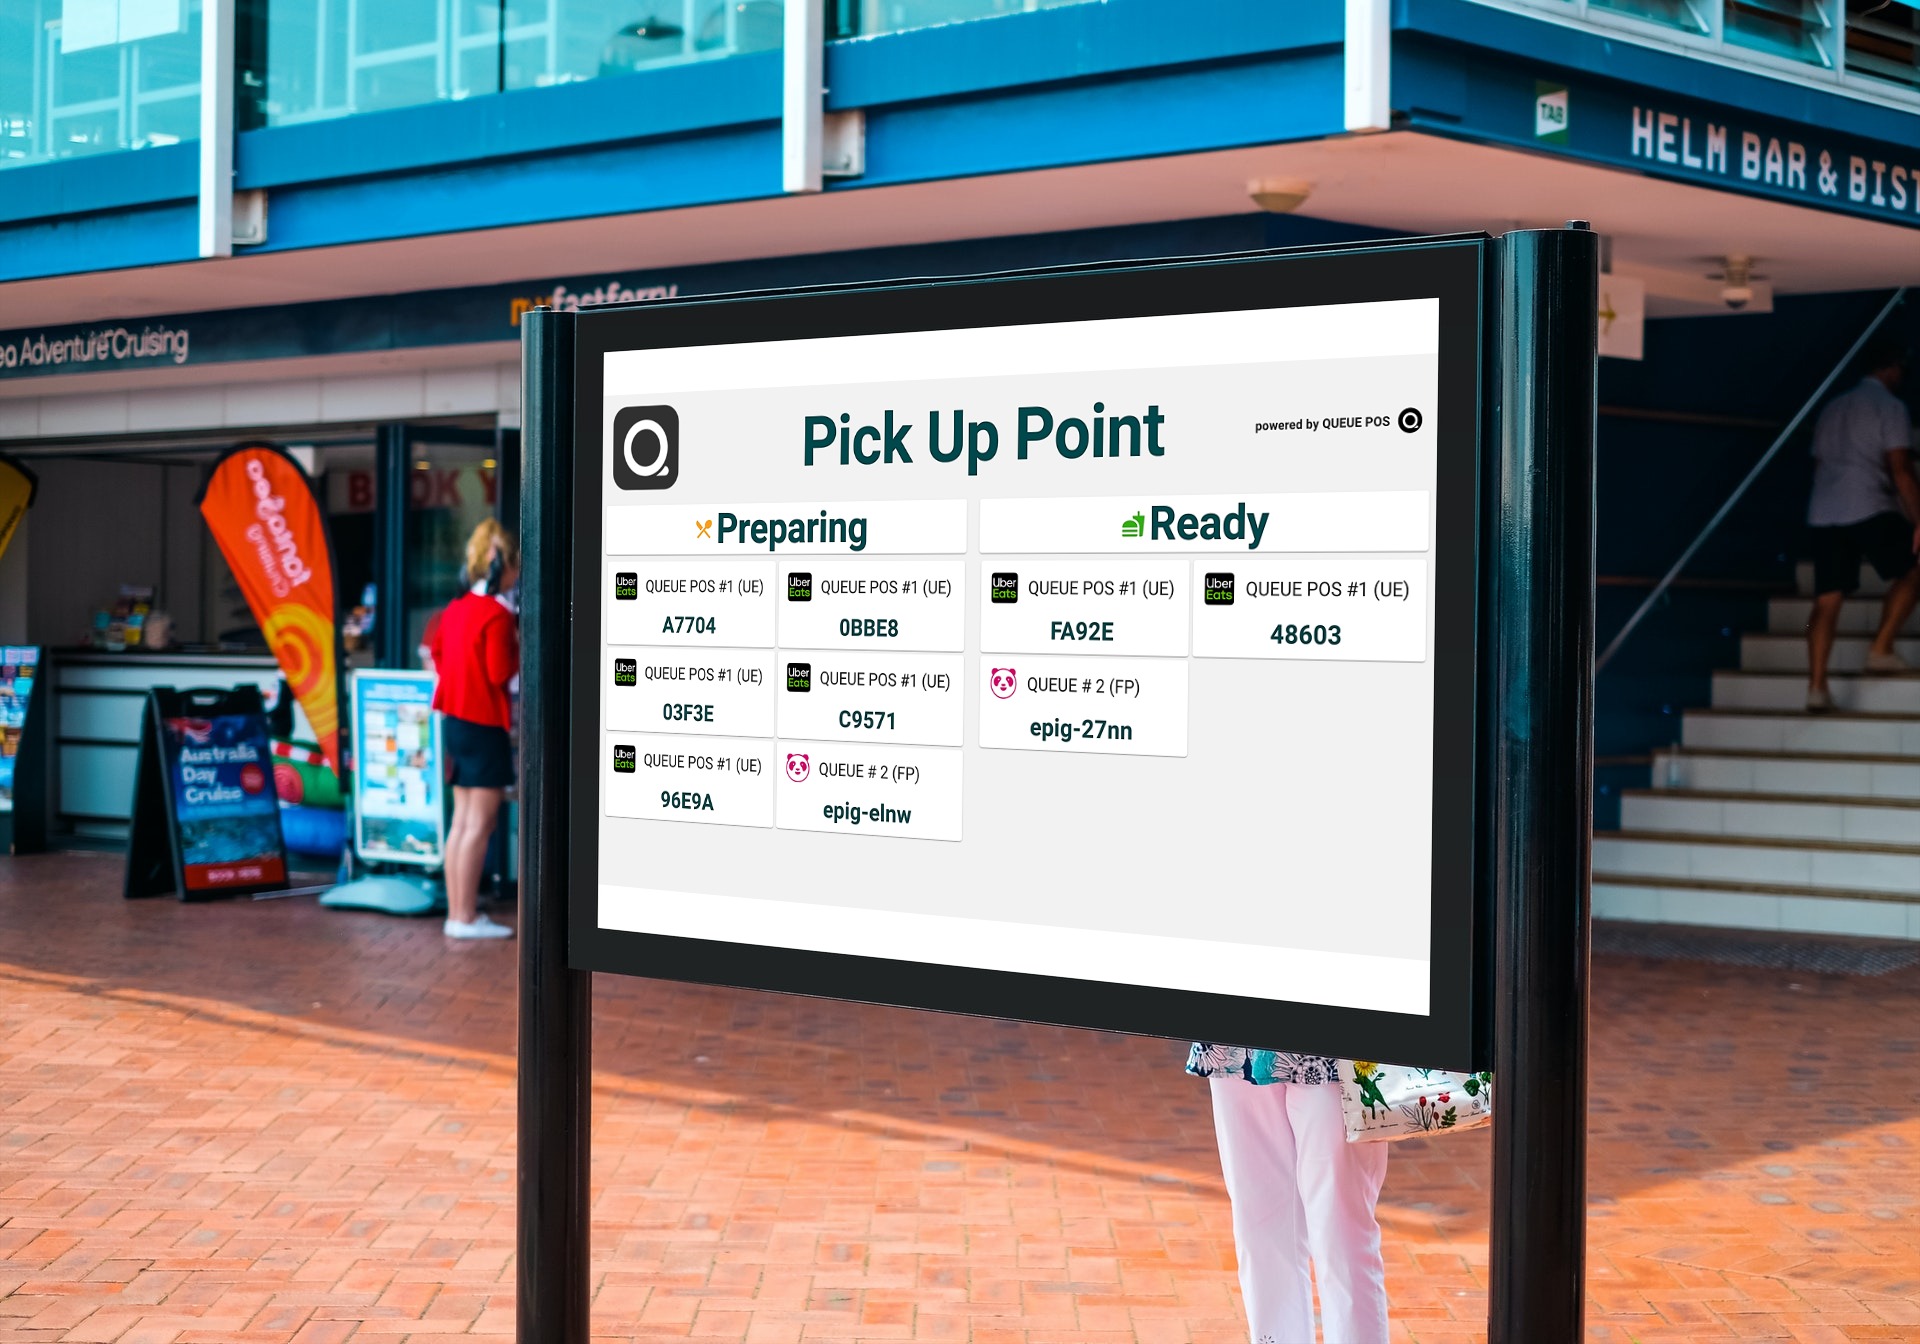
Rowdy Riders
If you’re selling a lot of food, you may find your pick-up space getting crowded with people who need constant updates on the status of their orders. So we offer a unified pick-up interface that helps the staff pack and check all items, along with automatically updated “Preparing” and “Ready” boards that can be shown on external monitors of your choosing.
Making Sense of Data
Understanding how well a brand is performing across multiple delivery platforms can be a headache. But with QUEUE’s automatic aggregation of that data, you can measure a brand’s performance at a glance.
You're in great company


Cloud Point of sales
QUEUE Cloud Point of Sale is a full featured solution that has all the functionality you need to run your business. With our customizable platform we offer a state-of-the-art experience that will keep your business running efficiently and reliably.
Feature highlight
- Connect unlimited number of iOS & Android devices
- Mobile First. Update your settings and menu anywhere, anytime
- Real-time Inventory system
- Multiple Kitchen Display stations (KDS)
- Real-time reporting
- Staff Time sheets
- Packaging interface
Why open a Cloud Kitchen?
We are witnessing a revolution in the food industry. By some estimates, online food orders will account for up to 40% of total restaurant sales by 2025. And as food delivery services grow in popularity, brands who do not follow the trend risk being left behind.
Powered by innovative new digital technology, cloud kitchens have evolved in response to this shift in consumer preferences, representing a win-win for both businesses and customers alike. In a cloud kitchen, multiple brands are able to share a single food preparation space optimized for food delivery. This model drastically reduces the costs and burdens of operating a food business while offering more convenience and variety to consumers who increasingly demand mobile-friendly solutions for ordering food. Cloud kitchens can be run as a collective, or a single owner may rent the space out to multiple third-party brands. In general, a good cloud kitchen can help food entrepreneurs to:
| Reduce overhead costs: rent, staff, safety, and equipment maintenance |
| Reduce initial capital investment |
| Open up for business faster |
| Easily manage multiple brands, and even create special seasonal menus |
| Experiment with innovative flavors and concepts without taking on excess risk |
| Ultimately reach and serve more customers, especially from younger generations (no seating limitations on the internet!) |
Cloud Kitchen Platform
Optimize your cloud kitchen with an all-in-one platform solution. Fully integrated with Uber Eats and foodpanda, QUEUE Cloud Kitchen allows you to manage all online orders in one place, empowers you with a flexible cloud kitchen optimized Kitchen Display System and provides you with the information and tools you need in order to manage your cloud kitchen.
Feature highlight- Uber Eats, foodpanda, and self-service integration
- Cloud based client devices available for iOS and Android
- Cloud Kitchen optimized Kitchen Display System
- Cloud Kitchen Front Desk Management
- Real-time reporting and analytics
Order management
Your delivery orders will automatically appear in our system. No need to manually accept orders on separate devices and enter them into your POS system. We have official integration with leading delivery platforms.
Connect multiple brands
Serving multiple brands across multiple delivery platforms? No problem, with our Cloud Kitchen Platform you can operate all your brands from a single device.
Full menu synchronization
Setup your menu once and synchronize it across all delivery platforms in one step. Changes to your prices or menu items are instantly reflected on the delivery platforms.